This guide is applicable for both old and new generation (5th and 7th generation) Amazon Fire 7 tablets.
Preface
Over the past few years, Amazon has been making aggressive moves to dominate the hardware market. They have introduced low-cost tablets, smart home devices, e-readers, and other gadgets.
I am in love with many of Amazon’s tech gadgets. They are affordable, and often the best options in their price segment. But the thing about Amazon gadgets is that they are priced low signup more users into the Amazon ecosystem. Every single tech gadget that Amazon makes – from the Kindle e-reader to Fire TV Stick – is heavily modified to make use of as Amazon ecosystem services as possible.
The Amazon Fire 7 (7th generation) tablet is no different. This is hands down the best tablet you can get for that budget. The hardware is good, but the issues lie on the software front. Amazon tablets run a heavily skinned and moded version of Android, which Amazon calls the “FireOS”. The Fire 7 7th generation tablet is loaded with Amazon’s bloat. Over time, the tablet gets slow because of the bloatware it hosts. Problem is, we cannot uninstall most Amazon apps.
In the past, the Amazon Fire 7 5th generation had been bypassed to run custom ROMs like CyanogenMod (later LineageOS) and SlimLP. I used to own a Fire 7 5th gen tablet on which I loaded CyanogenMod. On the 7th generation Fire 7 tablet, Amazon had apparently learned from its past mistakes and patched the exploit that allowed custom ROMs to run. Thus, the 7th generation tablets were stuck on FireOS.
But a few weeks ago, someone on XDA had found a way to hack into both 5th and 7th-generation tablets, permanently unlock its bootloaders and load TWRP (a custom recovery) on them.
So let’s get on it!
Requirements
We will need the following things to hack the Amazon Fire 7 tablet (Both 5th and 7th generation):
- A Linux Computer. If you use Windows, have a USB flash drive (Minimum 4 GB) ready. We will live boot Ubuntu with it. You will need a dedicated Linux OS, virtual machines will not work.
- A USB cable.
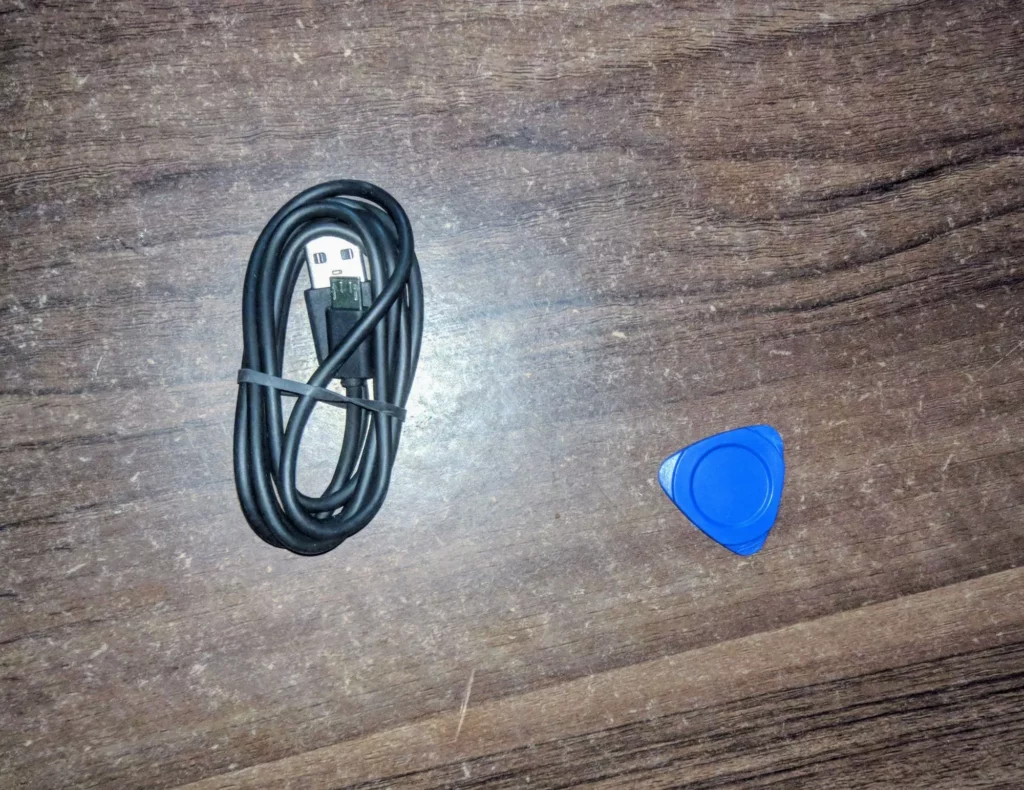
To open the tablet, you will also need:
- A guitar pick (to pry open the tablet back cover).
- A paper pin / tweezers / something conductive.
Getting a workable Linux system up (skip if you already have a Linux computer)
We will need a Linux OS to run our scripts. If you use Windows or Mac and do not have access to a Linux machine, follow the steps below to get a workable Ubuntu (a Linux distribution) environment set up (you will need a flash drive):
- Download the Ubuntu 18.04.2 Desktop Image: Here
- Download Rufus (Windows): Here
You can use UNetbootin if you have a Mac: Here - After you have Rufus or UNetbootin installed, plug in the flash drive.
- Select the ISO file (On Rufus, use Boot Selection option).
- Leave all the other options default.
- Click start. Wait for the process to finish.
After the process is complete, you will have a bootable Ubuntu 18.04.2 USB drive. You will need to boot to that USB drive.
Restart your computer and go to the BIOS by pressing DEL/F2/F8 (different for each computer). Adjust your BIOS boot setting to boot from the USB drive. Then Save and Exit.
You should be on the Ubuntu live instance. You do not have to install Ubuntu, we can work from our live environment.
Making our Linux system ready
After we have a workable Linux system up and running, we need to install the dependencies.
- Open a terminal window (CTRL+ALT+T, or from the menu).
- We need to install some dependencies. Copy and paste the commands on the terminal:
sudo apt updatesudo apt install python3 python3-serial android-tools-adb android-tools-fastboot - Stop ModemManager:
sudo systemctl stop ModemManagersudo systemctl disable ModemManager
Hacking the Fire 7 (Both 5th generation and 7th generation)
We now have a Linux system fully ready. We can now dive into hacking the Fire 7 tablet.
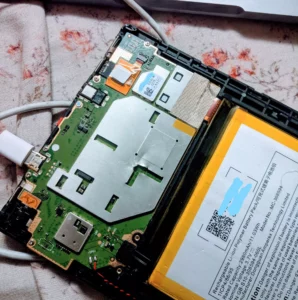
First, we will need to open our tablet’s back cover and find the corresponding pin that we will need to short to force our tablet to boot to the bottom.
To open the tablet’s back cover, insert a guitar pick on one side of the tablet and slowly move it toward the other side. You should be able to easily remove the tablet’s backcover.
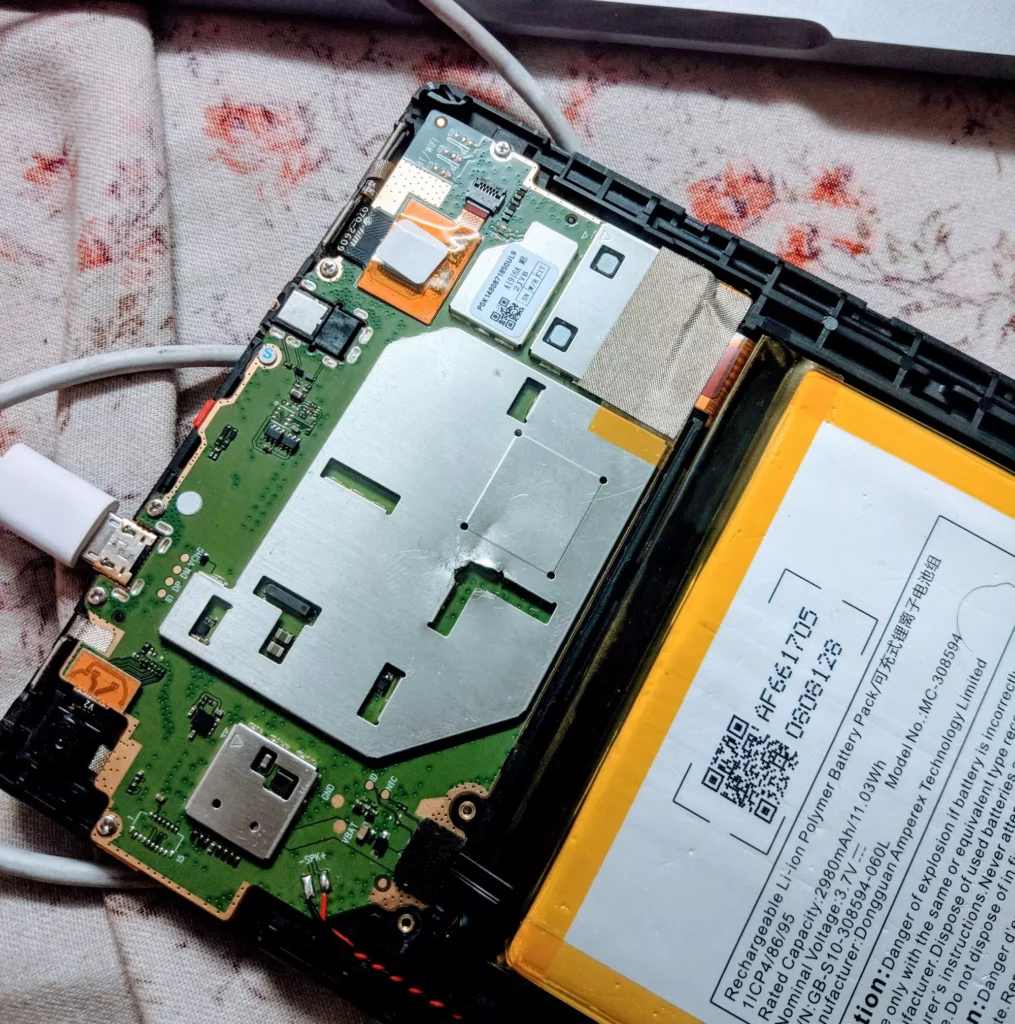
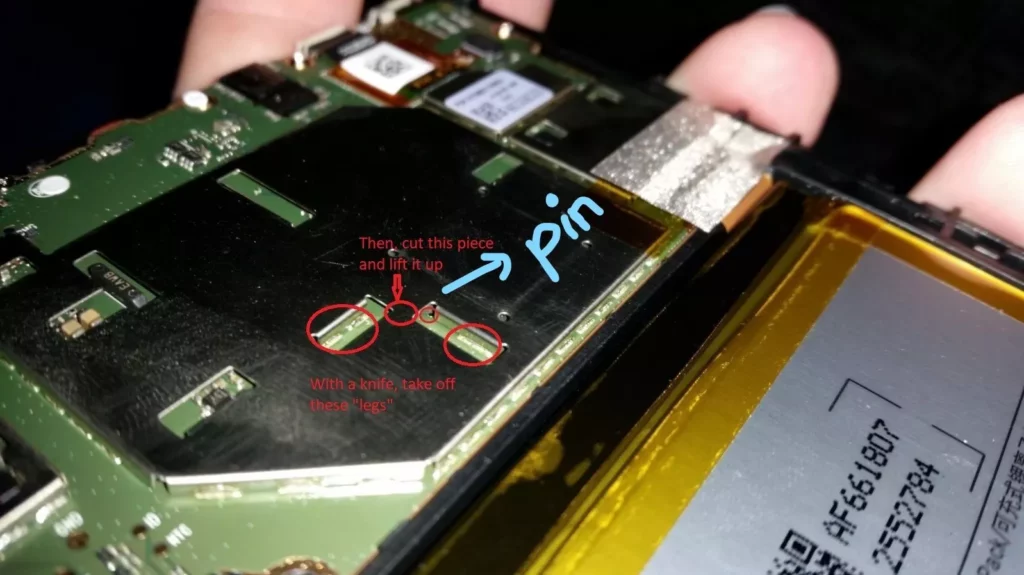
You will need to find the tablet’s corresponding pin. Take a look at the image below to see the pin we will need to short.
After you have the hardware side taken care of:
- Download the script from here:
5th generation
7th generation - Open a new terminal window.
- Navigate to the download folder:
cd ~cd Downloads - Unzip the script:
unzip fire.zip - Navigate to the extracted folder:
cd amonet - Start the script:
sudo ./bootrom-step.sh - Turn off the tablet. Take a paper pin or a pair of tweezers and touch the marked pin with that. Keep it touched.
- Now using a USB cable, connect the tablet to the computer.
- When the script asks you to remove the short, remove the paper pin and press “Enter”.
- After everything is done, your device will reboot to an unlocked bootloader.
- Now run the fastboot script:
sudo ./fastboot-step.sh - Wait for the process to finish. Your device should now reboot to TWRP.
Installing LineageOS
Now that we have TWRP and an unlocked bootloader, we can install LineageOS to replace the bloatware-riddled FireOS.
- Download LineageOS for 5th generation
Download LineageOS for 7th generation - Now using the USB cable, transfer the zip file to your tablet.
- From TWRP, go to Wipe and perform a “Factory Reset”.
- Go back to the main TWRP screen, and go to “Install”. Choose the zip file.
- Wait for the process to finish. “Reboot” your device when it is done.
The first boot should take around 2 minutes. And after that, you will have installed LineageOS on your Fire 7 Tablet.
Welcome to the new journey!